Tracked Cohorts
Learn how tracking cohorts can help you identify specific groups to respond to immediately
This article assumes you have already created a cohort in order to begin tracking it. If you have not, it is worthwhile referring the Cohort Discovery documentation to learn how to apply filters and create your cohorts.
Once you have identified the cohort that you wish to track, you need to set the tracking method. This can be done in three places:
- Activity center
- My Cohorts list
- Cohort dashboard
Activity center
To use the activity center to enable tracking on a cohort, follow these steps:
-
Navigate to the Home screen, and select the activity center from the Home toggle

-
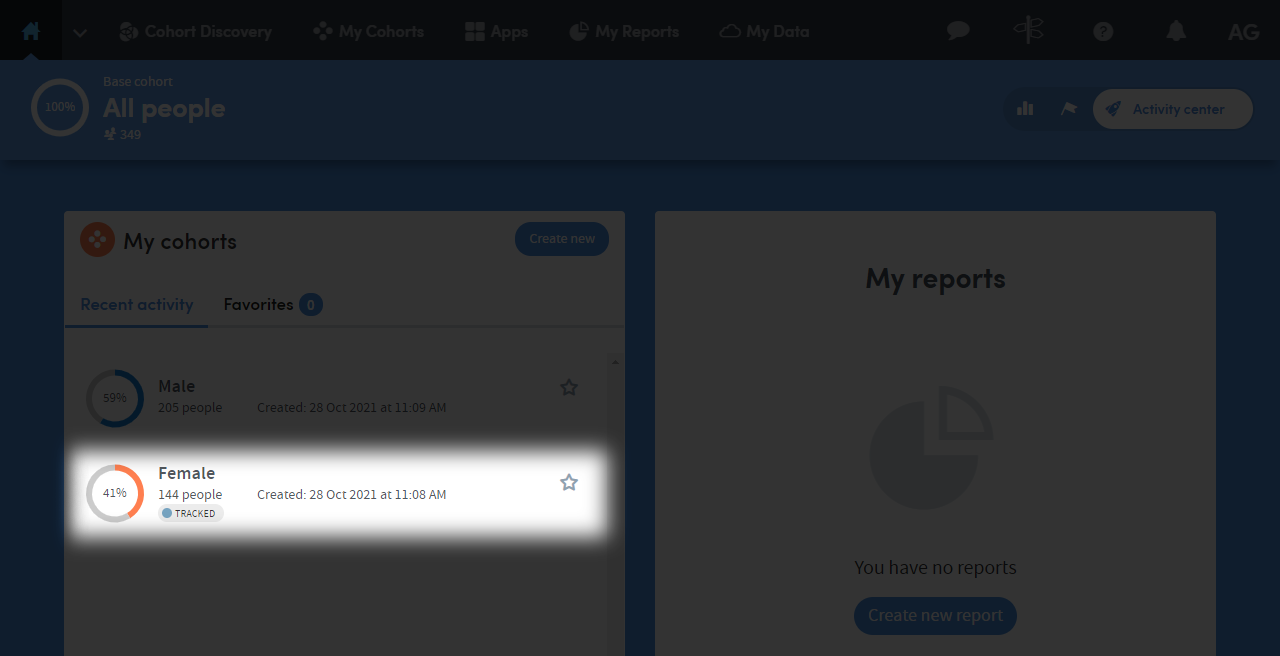
Once within the activity center, in the my cohorts panel, locate the cohort you wish to track
-
Click on the entry for the cohort to reveal the cohort actions toolbar and the Track option.
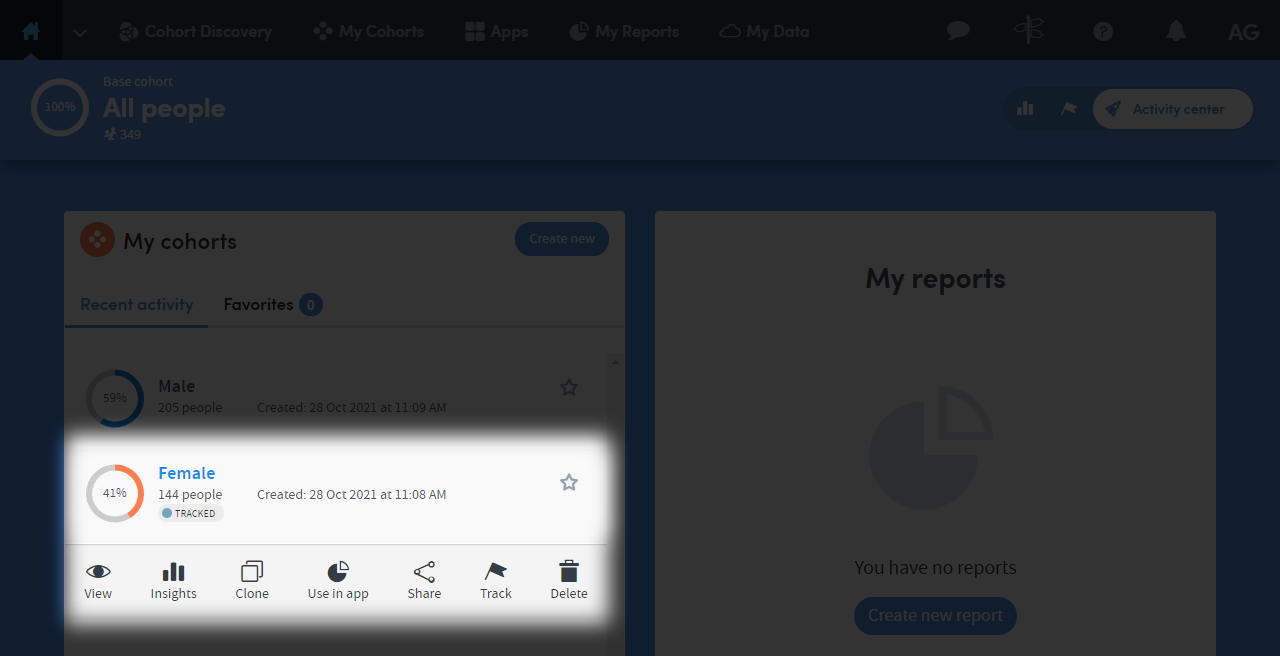 Learn more about the cohort actions toolbar
 -
Click on the Track option to open the Track cohort settings dialog
Now that you have accessed the tracked cohort settings, the next set of steps will take you through the options within the setting dialog.
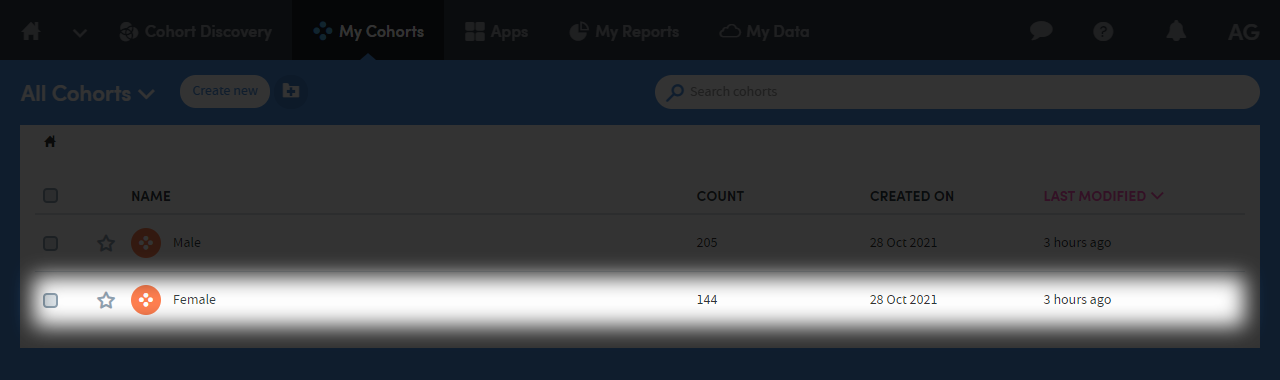
My cohorts list
To use the my cohorts list to track a cohort, follow these steps:
-
Navigate to My Cohorts from the primary navigation
-
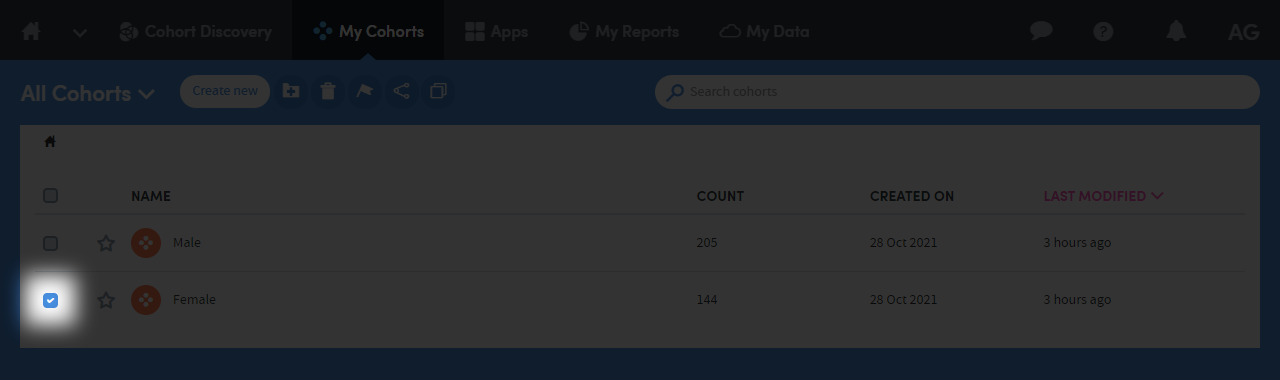
Locate the cohort you wish to track: you can do this either by scrolling through the list of cohorts, or by using the search bar to quickly filter the list of cohorts within Atmolytics Cloud
-
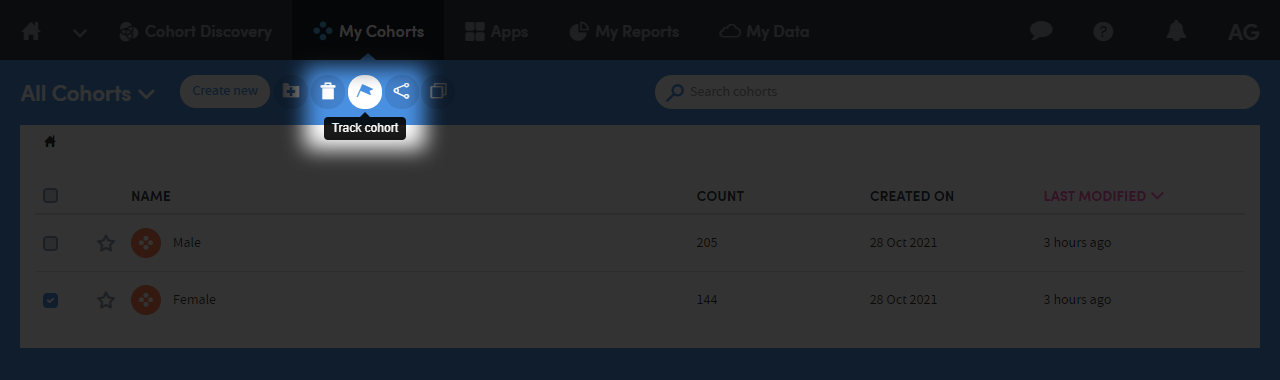
Once the cohort has been located, click on the checkbox to the left of the cohort’s name, this will reveal the cohort actions toolbar within the my cohorts screen
-
Click on the Track cohort option to open the Track cohort settings dialog
Now that you have accessed the tracked cohort settings, the next set of steps will take you through the options within the setting dialog
Cohort dashboard
Tracking is also available from the cohort dashboard, which is accessible in the following ways:
- Cohort discovery: Immediately after cohort creation
- Activity center: Using the view cohort option to take you to the cohort dashboard
- My Cohorts: by clicking on the cohorts name to take you to the cohort dashboard
Once you have opened the cohort dashboard, follow these steps:
-
From the dashboard click on the tracking tile to open the settings
-
Specify the settings as you would with the setting dialog.
 Information
The tracked settings dialogue in the cohort dashboard is different. Once you've applied your settings, this dialogue will:
- Show you an overview
- Show you the full history of what has happened with your cohort over time
- Show you when members joined or left the cohort
- Highlight when your cohort met a provided threshold
Now that you have accessed the tracked cohort settings, the next set of steps will take you through the options within the setting dialog
Tracked cohort dialog
As previously described the tracked cohort dialog within the cohort dashboard differs to the settings being applied in either the activity center or my cohorts areas of Atmolytics Cloud.
Overview
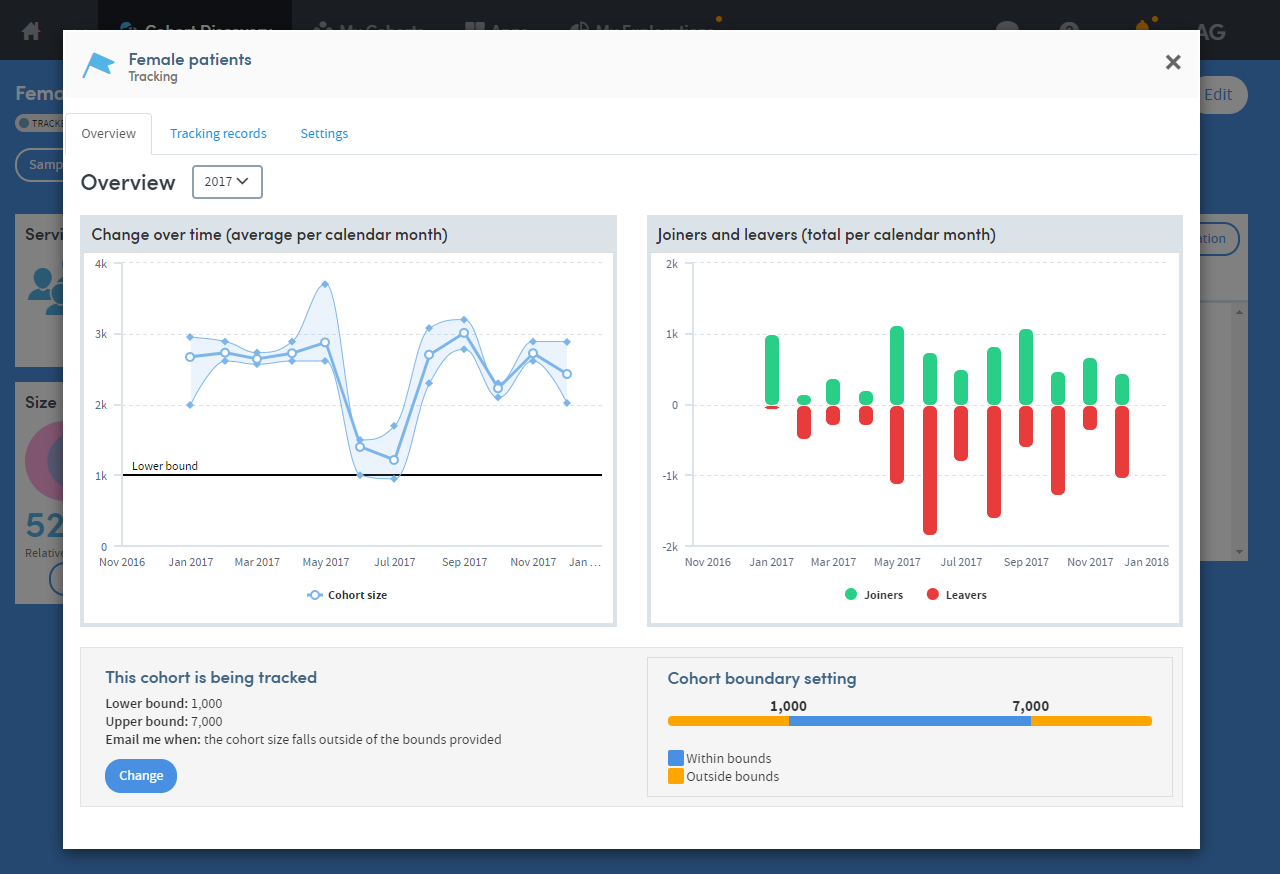
Change over time
The overview screen provides a by-year view on the change of the cohort over time graph, highlighting during what month the cohort met or fell outside of the boundary.
Joiners and leavers
The joiners and leavers graph shows the overal totals per calendar month of the number of members within the cohort.
Tracking status
The tracking status provides an overview of the settings of the tracked cohort and the ability to alter the settings.
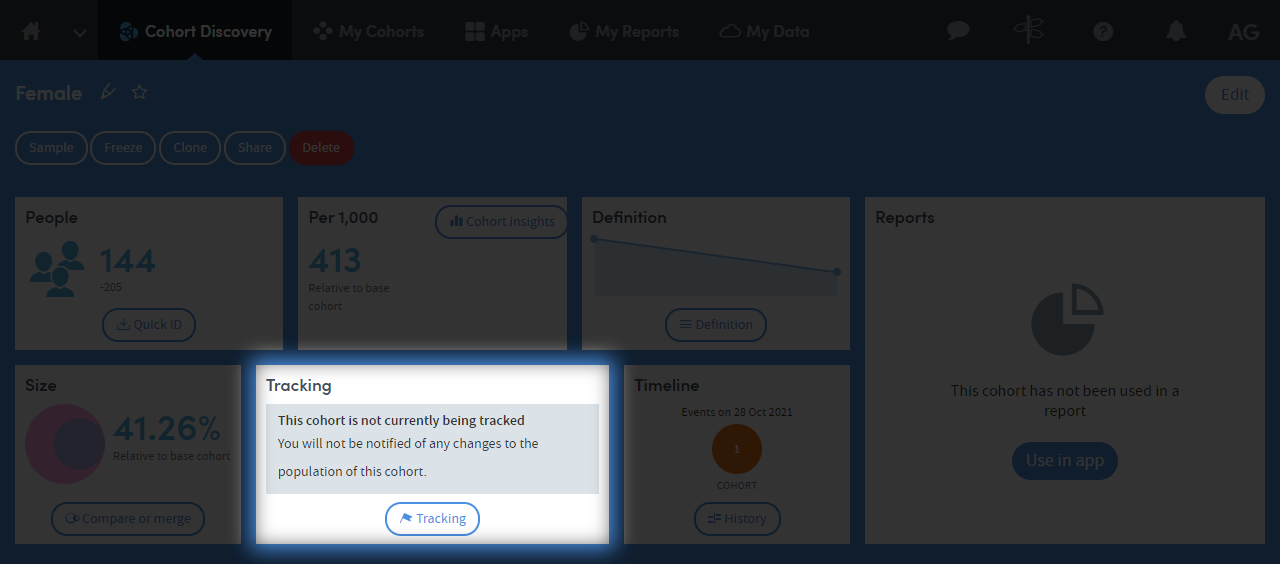
If the cohort was once tracked and is not currently being tracked the historical data is still accessible.
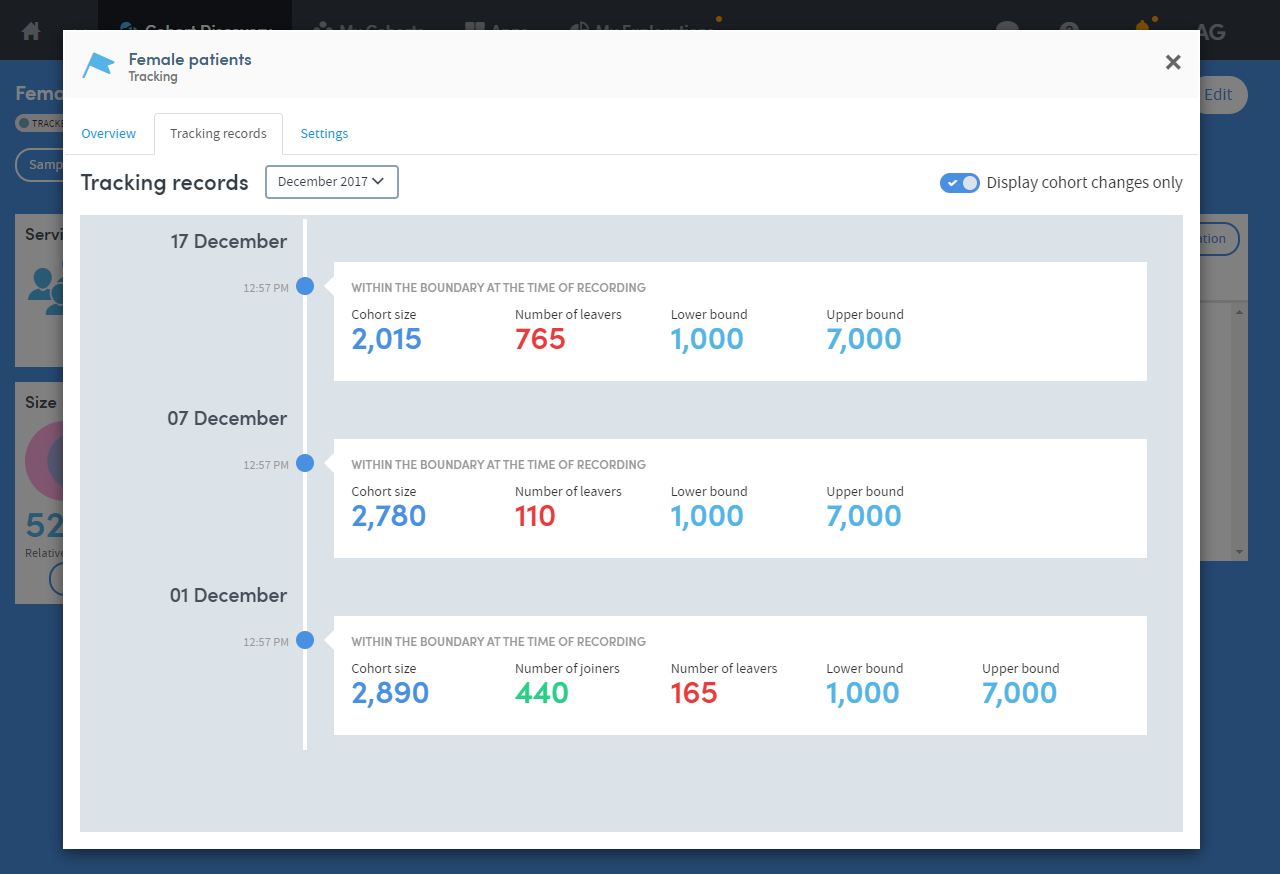
Tracking records
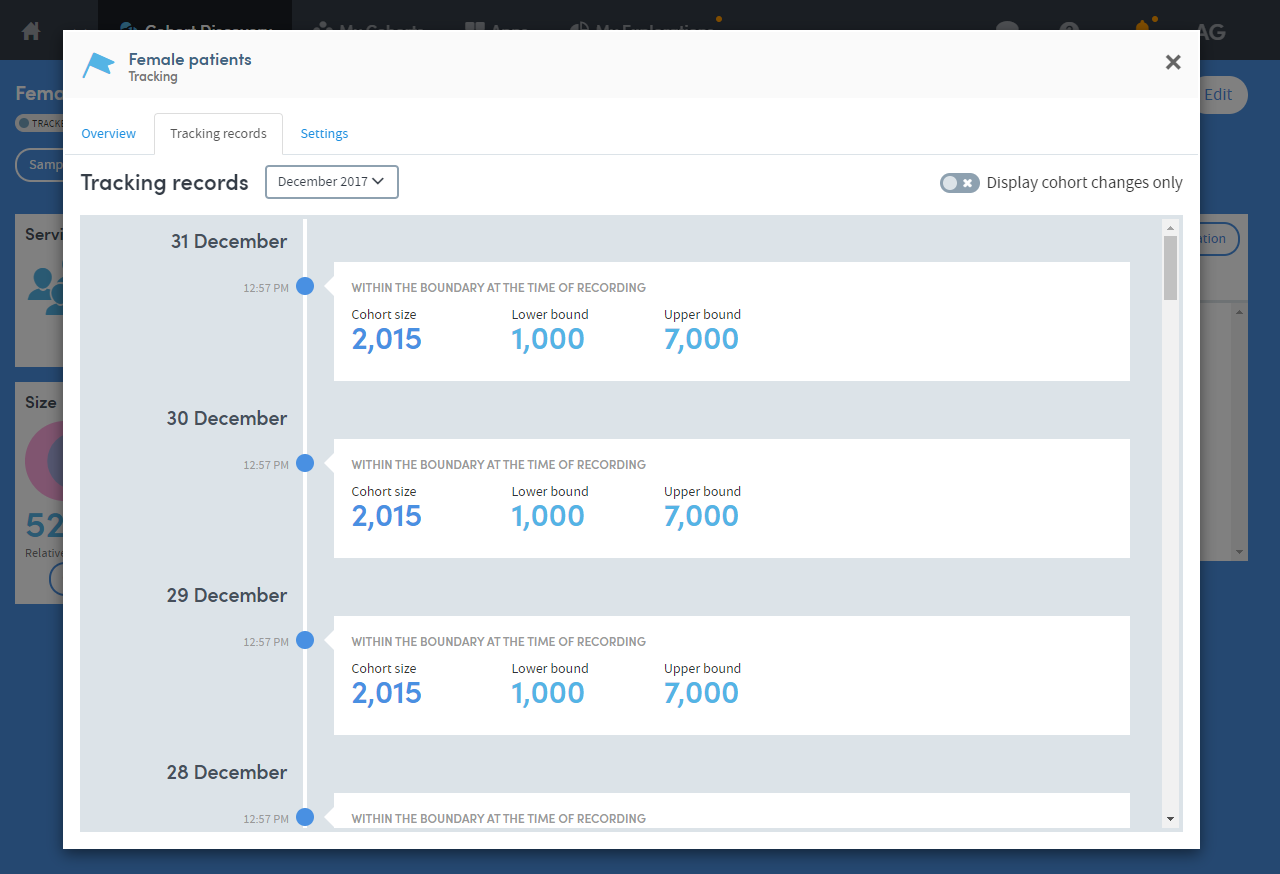 The tracking records screen provides a month-by-month view of the tracked cohort activity with the following information:
- Cohort size: the overall size of the cohort on a given day
- Number of joiners: the total members who met the cohort criteria on a given day and therefore joined
- Number of leavers: the tofal members who no longer met the cohort criteria on a given day and therefore left
- Lower bound: the lower bound at any given day, to help identify when the settings changed
- Upper bound: the upper bound at any given day, to help identify when the settings changed
Display cohort changes only
This toggle allows you to filter out any entries where there was no change to the cohort size on a given day.
Settings
The settings screen allows you to change the settings of the upper and lower bound, the notification type as well as disabling the tracking altogether.
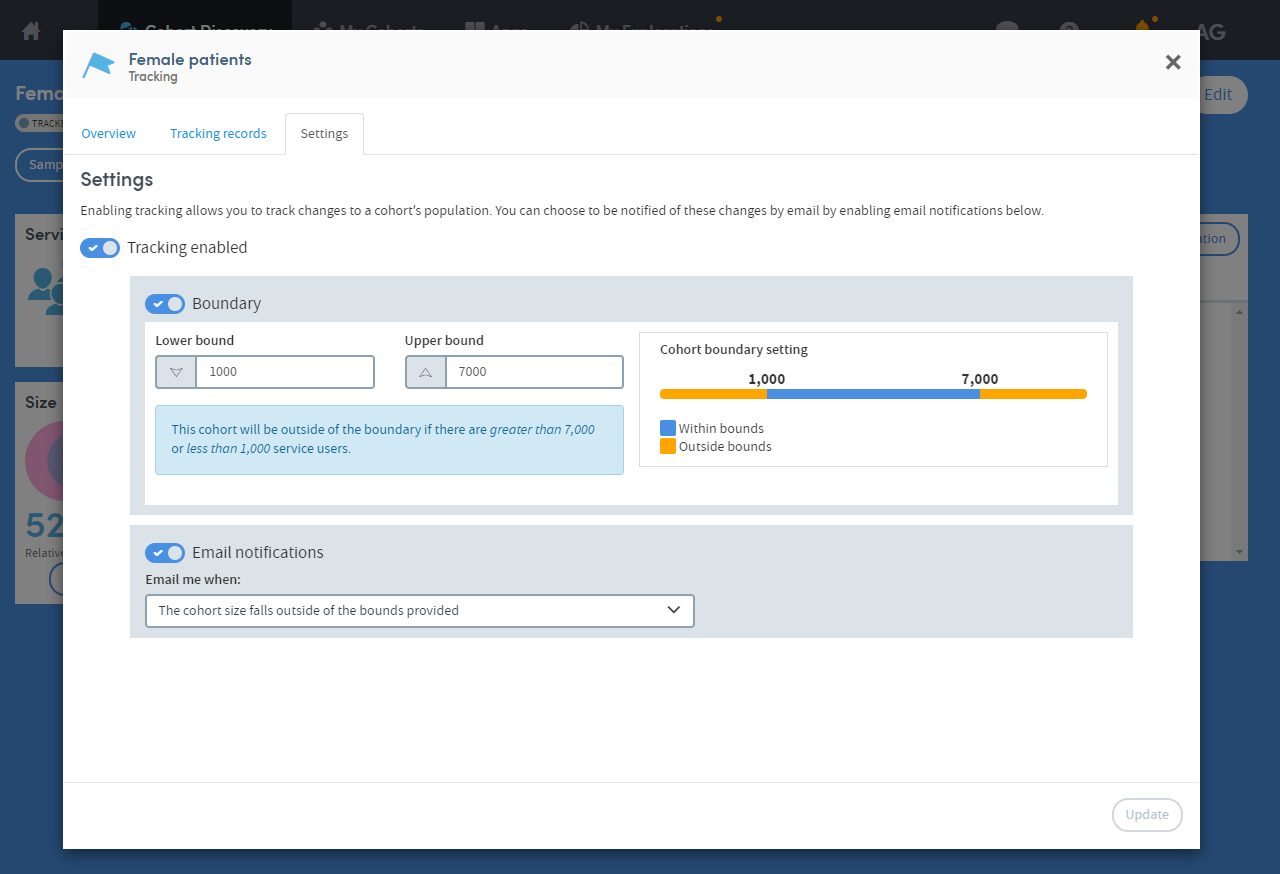
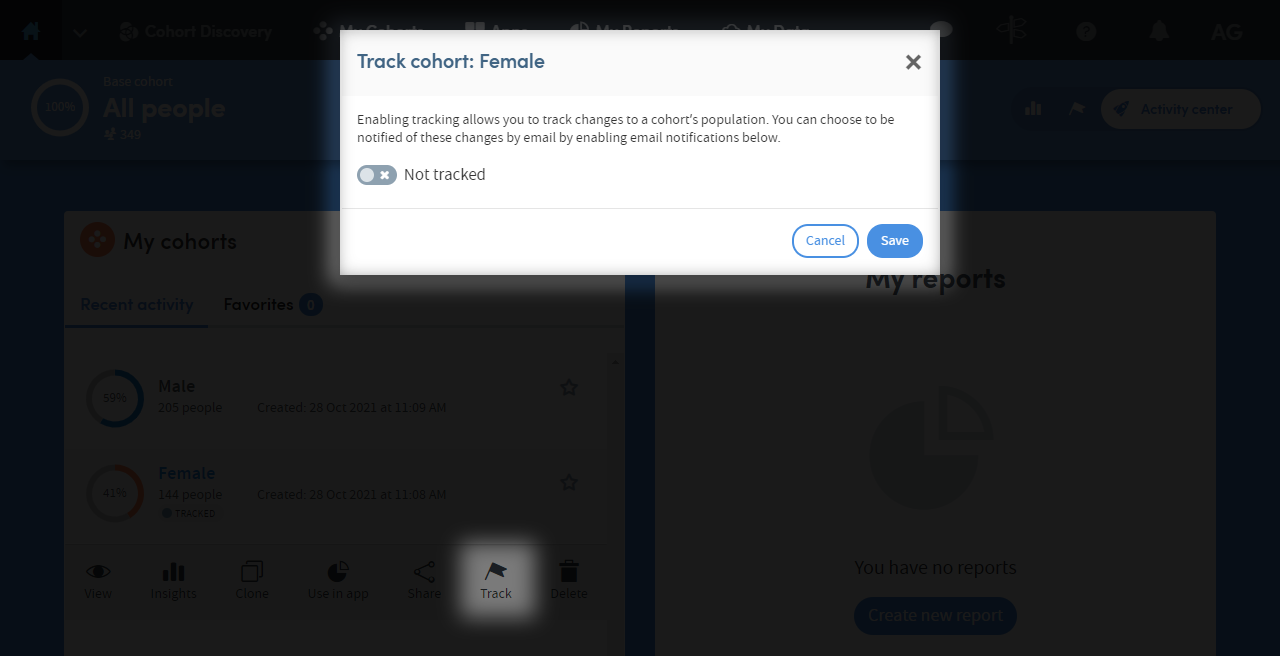
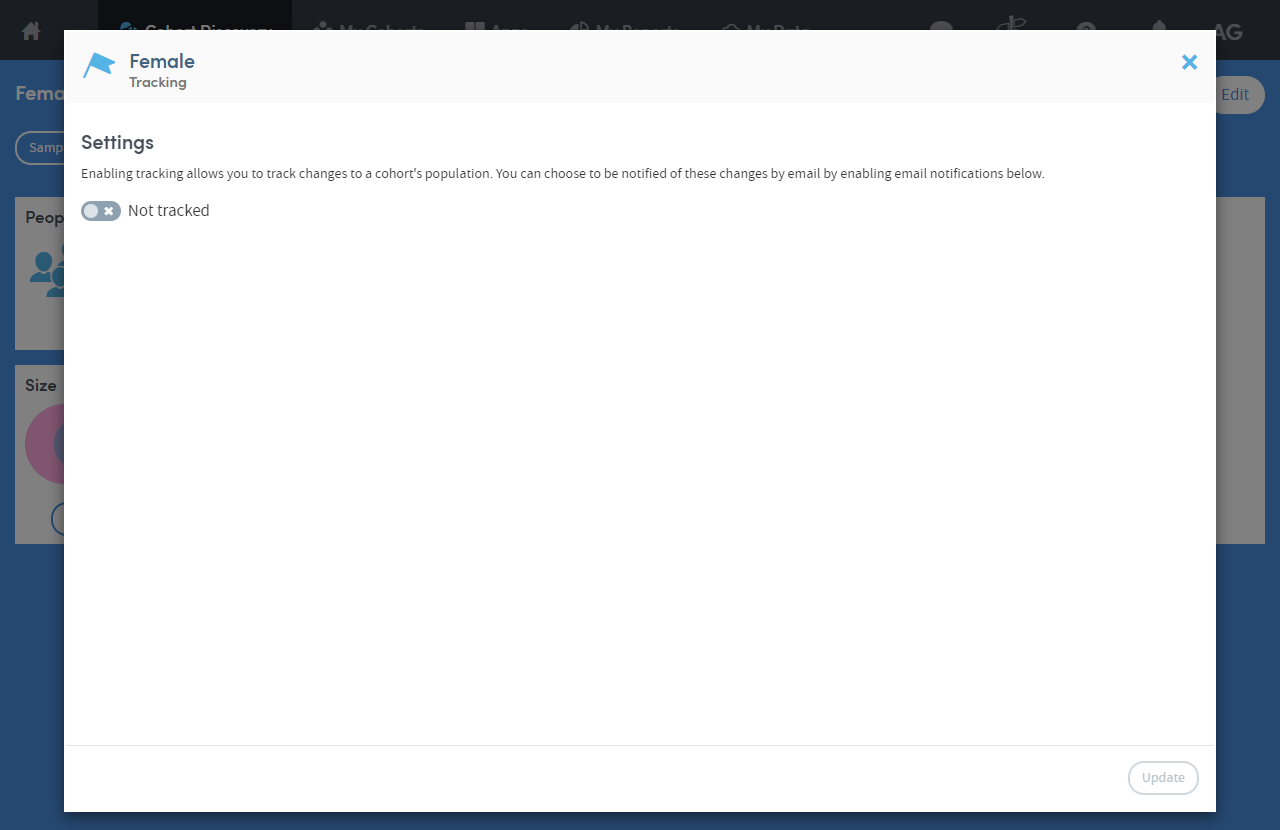
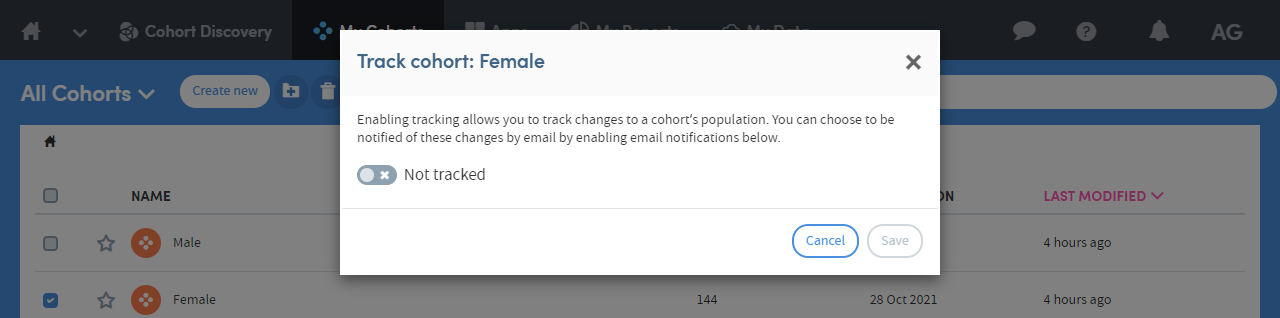
Track cohort settings dialog
The track cohort settings dialog gives you full control over how you want to track your cohort and receive notifications.
-
Toggle the tracking of the cohort, this will provide you the options to set a boundary and email notifications
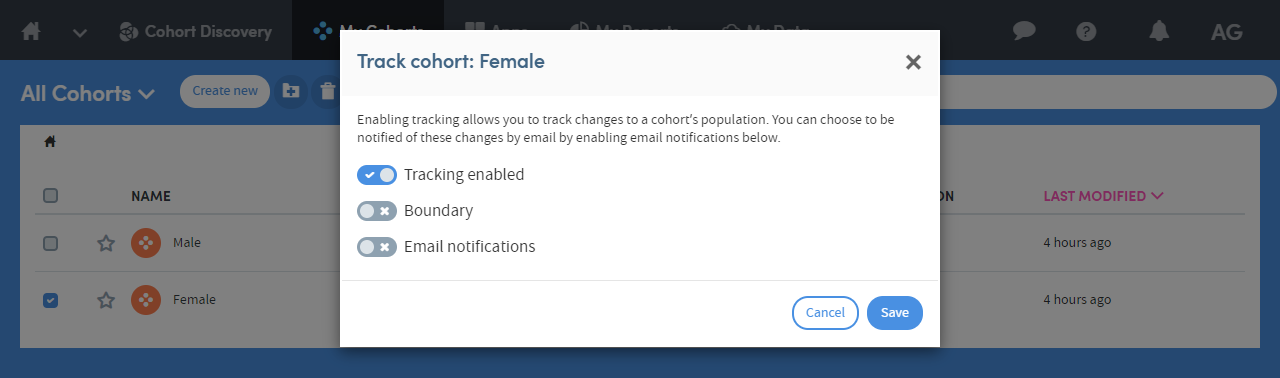
- Boundary: this allows you to specify a lower and upper bound for the number of subjects within the cohort.
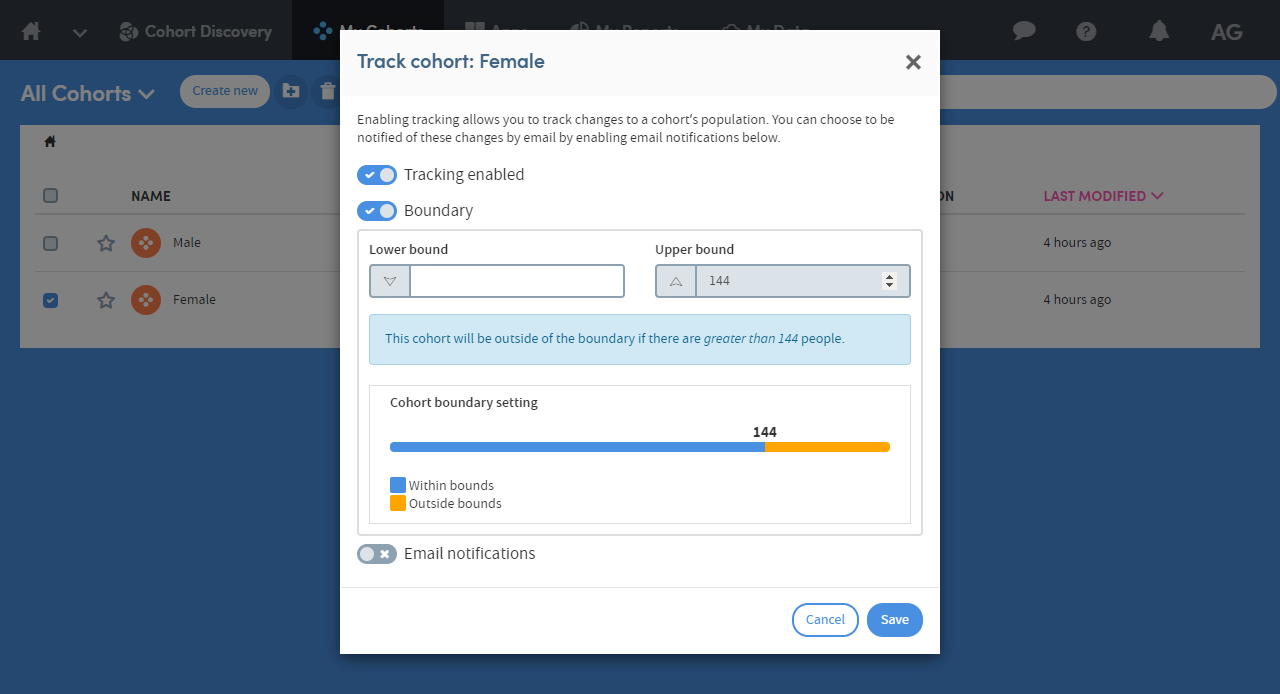
- Lower bound: the minimum number of your subjects you want to be in the cohort
- Upper bound: the maximum number of your subjects you want to be in the cohort
For example:
- If you were in an education setting, you might want to set up a cohort that contains pupils who had more than five did not attend school days. You could then use the cohort tracking to notify you when a threshold had been met across a school year or entire school which may affect the overall attendance figures for the school year
- By setting up the tracking of the cohort, you would then be able to receive a notification that this threshold has been met for the school year or year group, or simply when a pupil joined the cohort
- Email notifications: there are four types of notification:
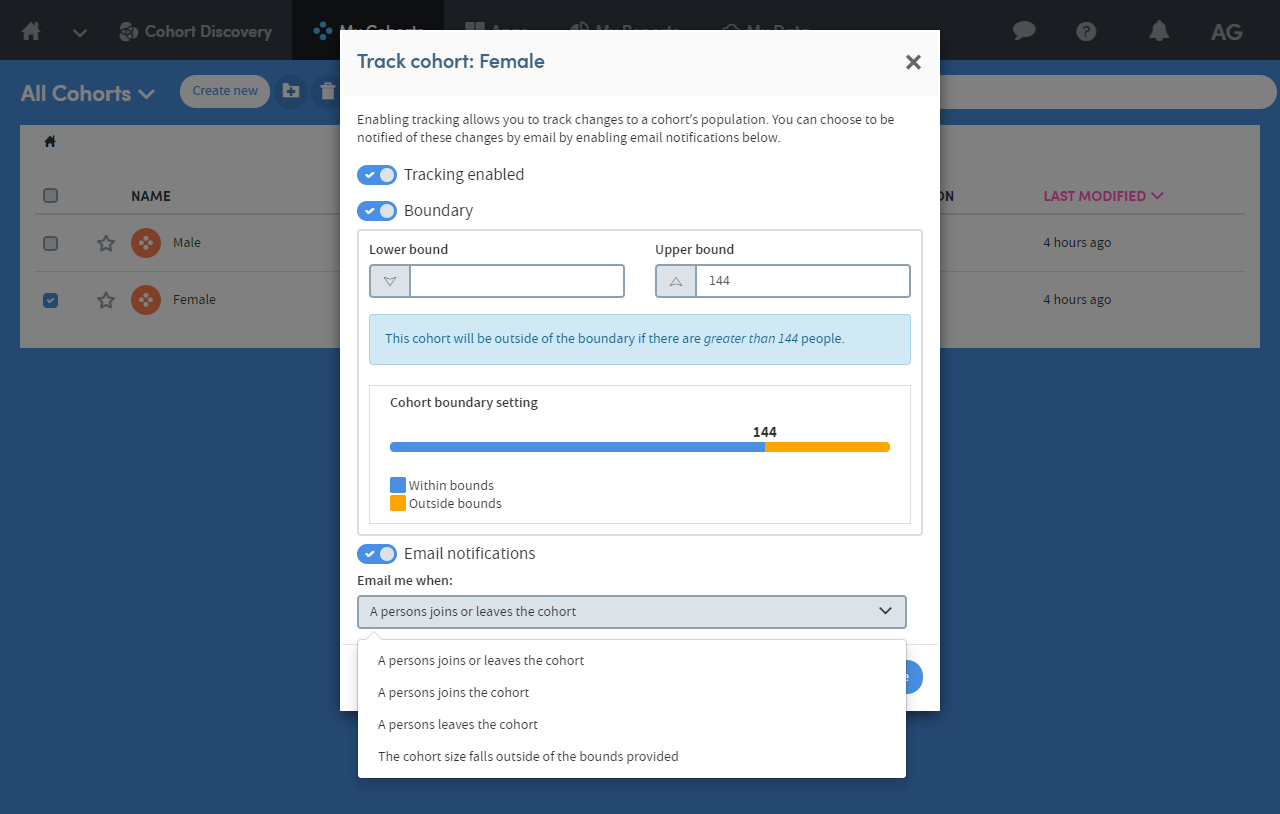
- A subject joins or leaves the cohort: notifies you with a running total of how many members are within the cohort
- A subject joins the cohort: notifies you when a member joins the cohort
- A subject leaves the cohort: notifies you when a member leaves the cohort
- The cohort size falls outside the bounds provided: notifies you when the threshold specified by the boundary has been met
- Save the settings: once you have specified the settings for the cohort tracking, saving will provide you with updates when your data is refreshed
The boundary and email notifications can be used independently from one another, as such you can:
- Track a cohort without receiving notifications; or
- Track a cohort with a boundary without receiving notifications; or
- Be notified only when the members join the cohort; or
- Be notified only when the members leave the cohort; or
- Be notified only when the members join and leave the cohort;
If notifications are disabled, you will have to manually check up on your cohorts and their tracking activity.
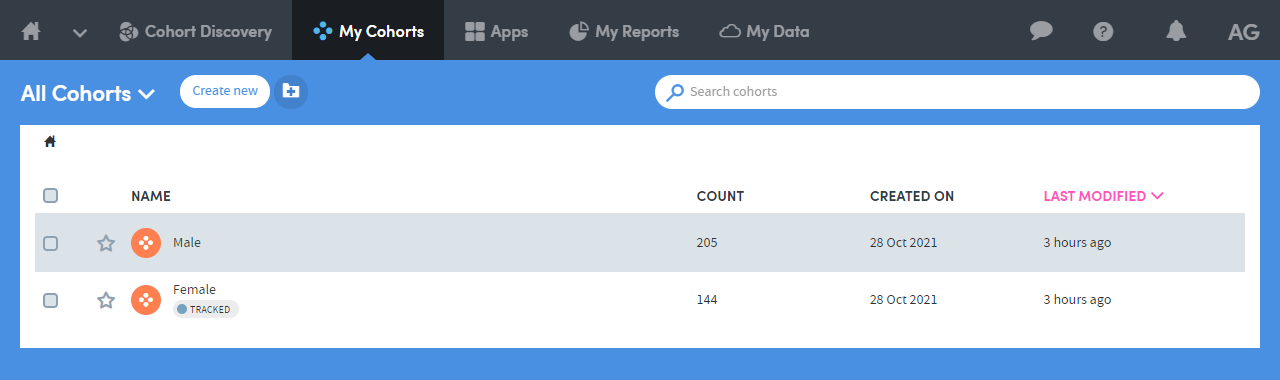
Identifying existing tracked cohorts

To identify cohorts that are being tracked, whereever the cohort is detailed within Atmolytics Cloud it will be accompanied with a label informing you of its tracked status.
Changing or disabling tracking settings
To change or disable the settings of the tracked cohort, follow the steps listed above to open the tracking settings dialog and make adjustments. The tracked cohort settings can be accessed from the activity center, my cohorts or cohort dashboard.
Home: Tracked cohorts
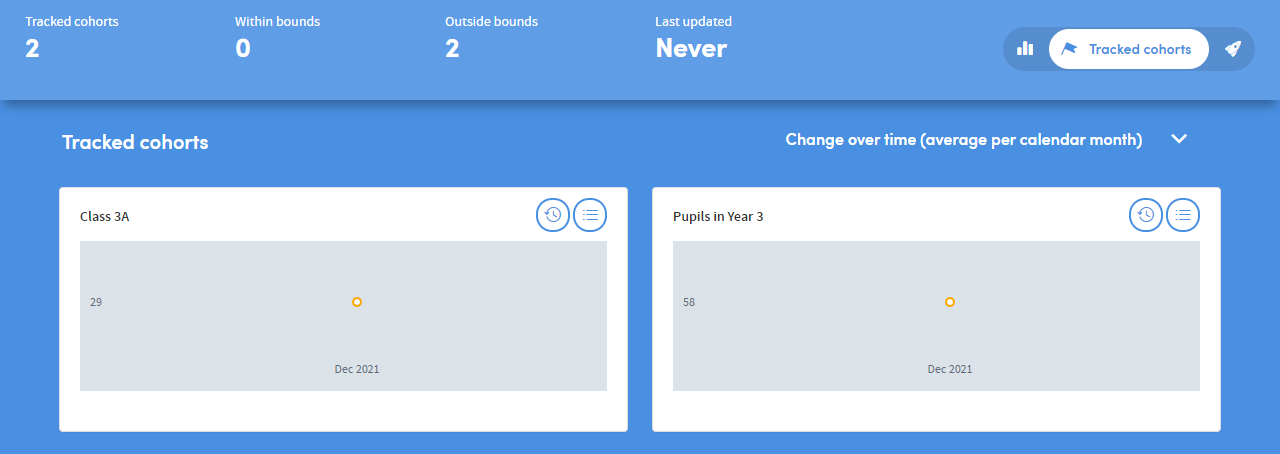
The Home > Tracked cohorts area provides an overview of all of your tracked cohorts in one place.
From the tracked cohorts area you can view the following:
- Total number of tracked cohorts
- Number of tracked cohorts which are within the boundary settings
- Number of tracked cohorts which are outside the boundary settings
- When the tracking data was last updated
In addition to these overview statistics, you’ll also be able to view the following:
- Change over time: a trend graph of changes on average per calendar month
- Cohort size: a trend graph of your cohort over the last year
- Joiners and leavers: the total joiners and leavers per calendar month
Further reading
- Previous article: Creating Your First Dashboard
- Next article: Cohort Discovery