Uploading your data
Learn about the upload process, data analysis and data types
The uploading process
Atmolytics Cloud removes the heavy lifting of migrating your data. Your dataset will go through a few steps to work with Atmolytics Cloud.
Step 1 - Formatting Atmolytics Cloud will format your data with its in-built upload tool.
Step 2 - Analysis Atmolytics Cloud will analyse your data.
Step 3 - Importing And finally, Atmolytics Cloud will import your dataset.
Choosing a data source
 The beta version of Atmolytics Cloud currently supports the following data sources:
- CSV (.csv)
- Excel Spreadsheet (.xlsx)
In the future, you’ll be able to connect Atmolytics Cloud to PostgreSQL, MySQL and SQL Server.
 Once you have chosen where your data is coming from, click ‘Continue’ to choose your data.
Excel files
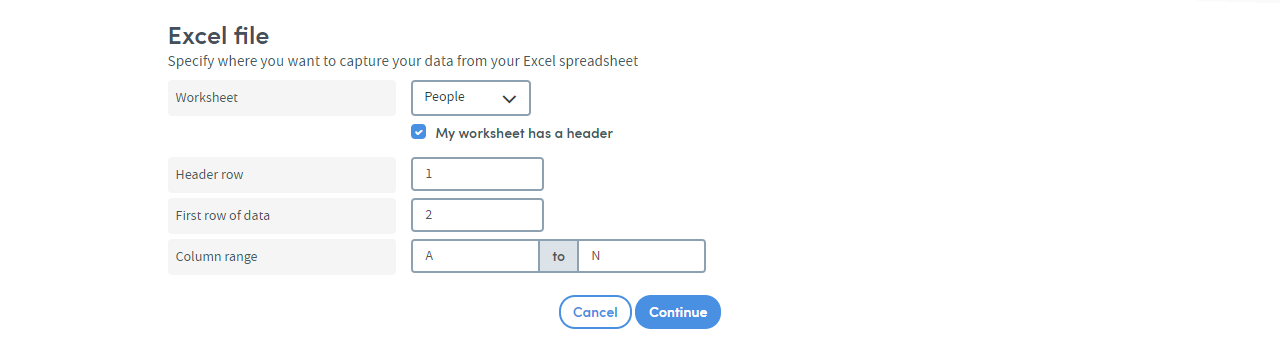
Atmolytics Cloud supports Excel files containing multiple worksheets. If you have multiple worksheets, the next screen will prompt you to choose from the following:
- The worksheet: the worksheet containing your dataset
- The header row: Atmolytics Cloud will try to detect this, though this can be overridden
- The first row of data: Atmolytics Cloud will try to detect this, though this can be overridden
- The column range: Which columns to include in the analysis
Atmolytics Cloud supports Excel files containing multiple worksheets. If you have a single file with multiple worksheets, you won't need to change anything.
CSV files
Atmolytics Cloud will read through each row and column contained in the CSV file.
Analysis results
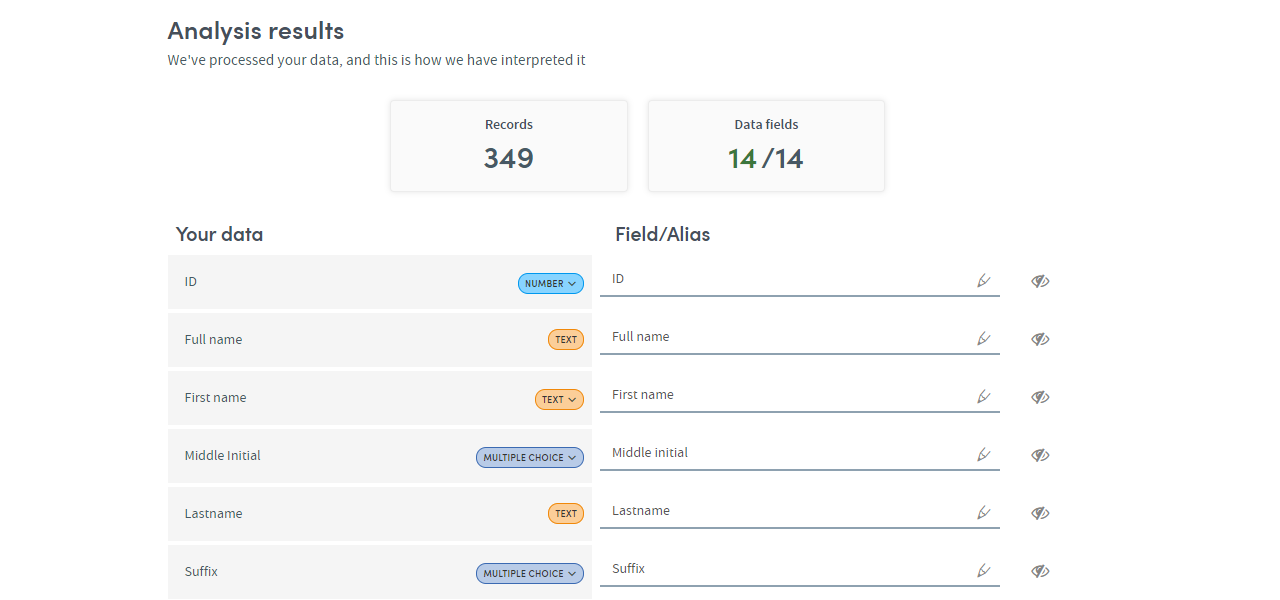 After Atmolytics Cloud has formatted your data, you’ll see the results screen. This screen provides a list of fields contained within your dataset.
Data types
 We use an algorithm to determine the data type in your dataset. The data types vary from text, numeric, multiple choice and dates. In some cases, you can change the data type.
Field names/alias
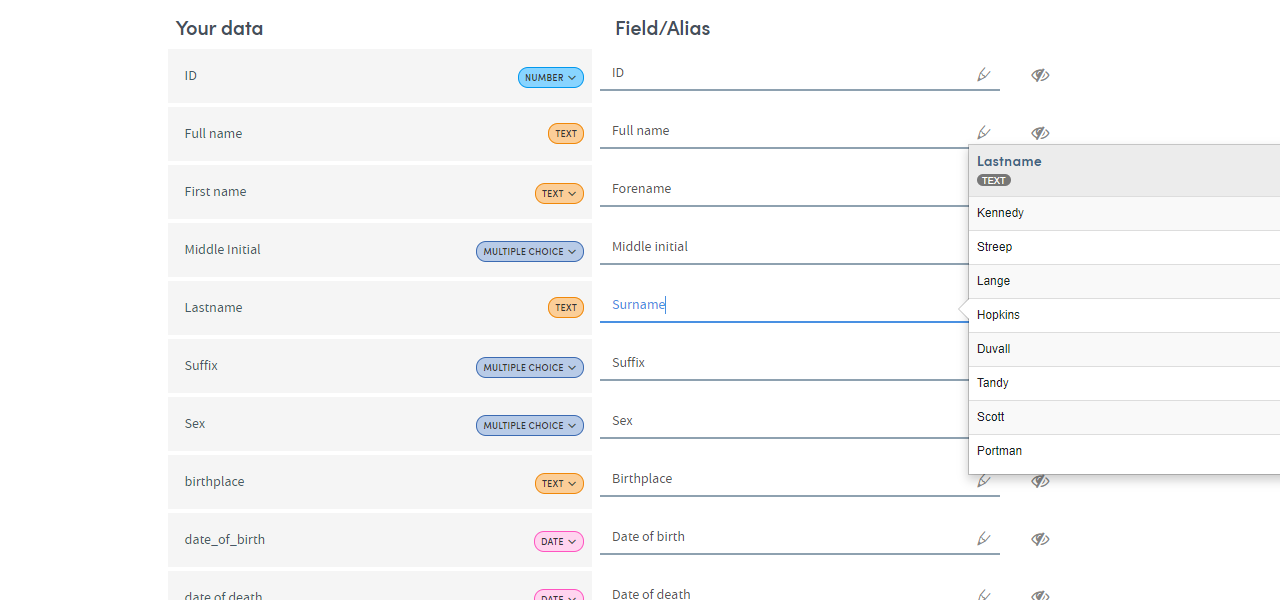 Sometimes header rows are written in shorthand or are missing. On the results screen, you’ll be able to:
- Change the data type; and
- Rename fields; and
- Hide fields
This can be useful if you have a large dataset. You’ll be able to break down your dataset into multiple smaller datasets. This can be useful when you start to analyse your data in Atmolytics Cloud.
When you’re happy with your edits, click ‘Continue’ to move onto specifying some key data fields.
Key data fields
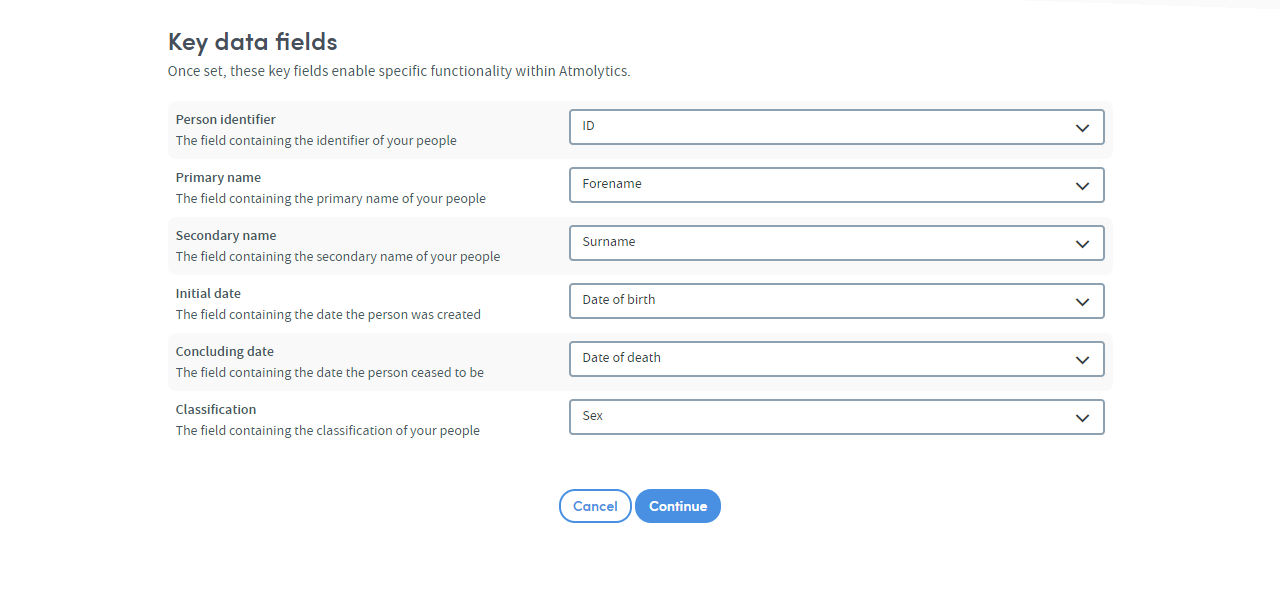 Key data fields enable specific functionality in Atmolytics Cloud. During analysis, Atmolytics Cloud tries to pre-select fields that match our algorithm. You can override these fields, but you might lose some features.
When you’re happy with your key data fields, click ‘Continue’ to start importing your data.
Naming the dataset
 The final step in importing your data is to give your dataset a name. Naming your dataset helps to identify it when using Atmolytics Cloud.
After you’ve named your dataset, click ‘Import’. This will save the dataset into Atmolytics Cloud.
Further reading
- Previous article: Preparing Your Subject Dataset
- Next article: Linking Datasets Together