Cohort Discovery
Comprising of a wealth of data segmentation and comparison tools, get the most out of your subjects with Cohort Discovery
Accessing Cohort Discovery
The Cohort Discovery area, where you create and edit cohorts, can be accessed in a number of ways; either by clicking on Cohort Discovery on the top navigation bar, by clicking Create new within the My Cohorts area or by clicking Create new in the My Cohorts area of the Activity Centre.
Initial settings
 Within the Scope section of Cohort Discovery, you’re setting the context of the subject matter in the cohort you’re creating.
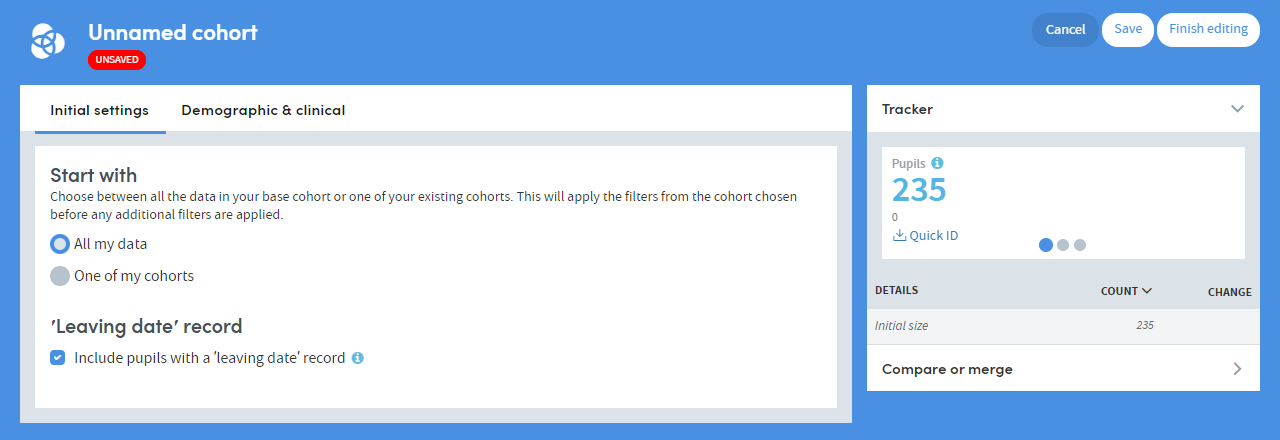
The Initial settings screen determines the ‘area’ from which the counts in your cohort will be selected.
It has two parts, Start with and your Concluding date
Start With
You can choose to start with all data in scope, or you can select an existing cohort. This will be useful if you have a defined cohort with specific criteria that you wish to further explore with additional filters.
If you have not yet created a cohort the start with filter will be unavailable.
Concluding date filter
You can choose whether to include subjects with a concluding date in your cohort. Unchecking this option will exclude all of the members with a concluding date record.
If the subjects you have uploaded do not contain a field associated with the concluding date during the key fields mapping, the concluding date section will not be available.
Dataset filters
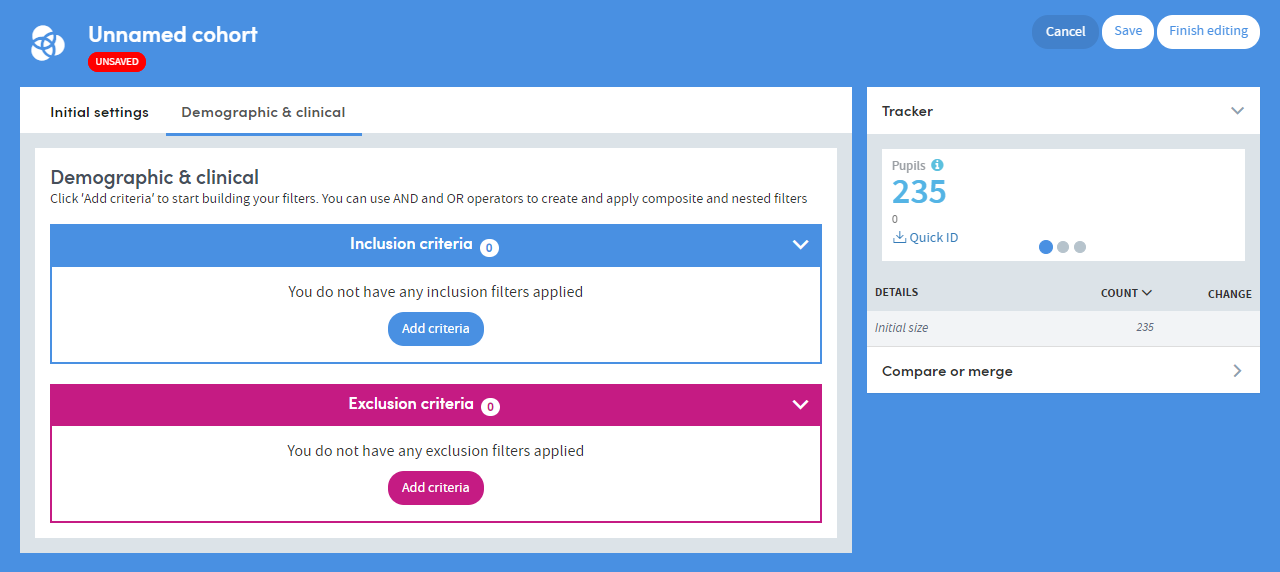
The Dataset filters area enables you to select patients based on combinations of filters from the various datasets available to you in Atmolytics.
Any data item included within any dataset will automatically be available to you as a filter within Cohort Discovery.
You build filters by including or excluding specific criteria. You can use the logical operators AND and OR to create and apply composite and nested filters.
Start by clicking Add criteria for either inclusion or exclusion criteria.
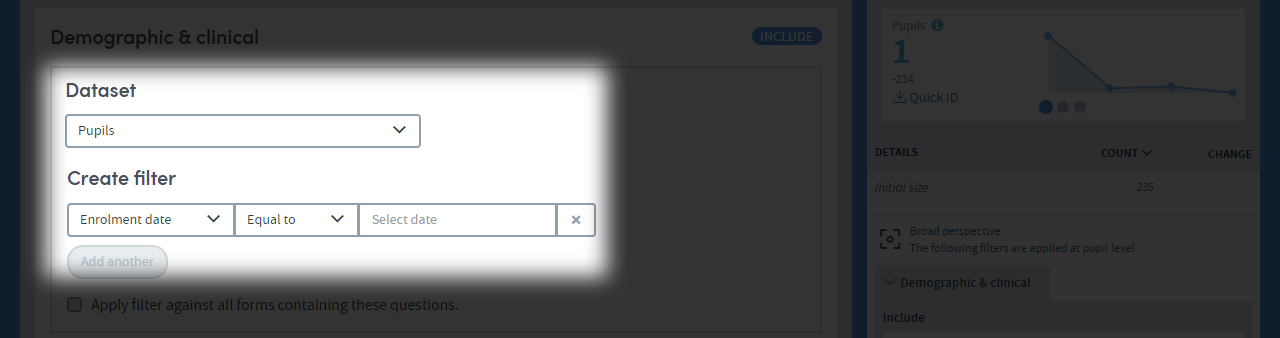
You’ll see the following screen
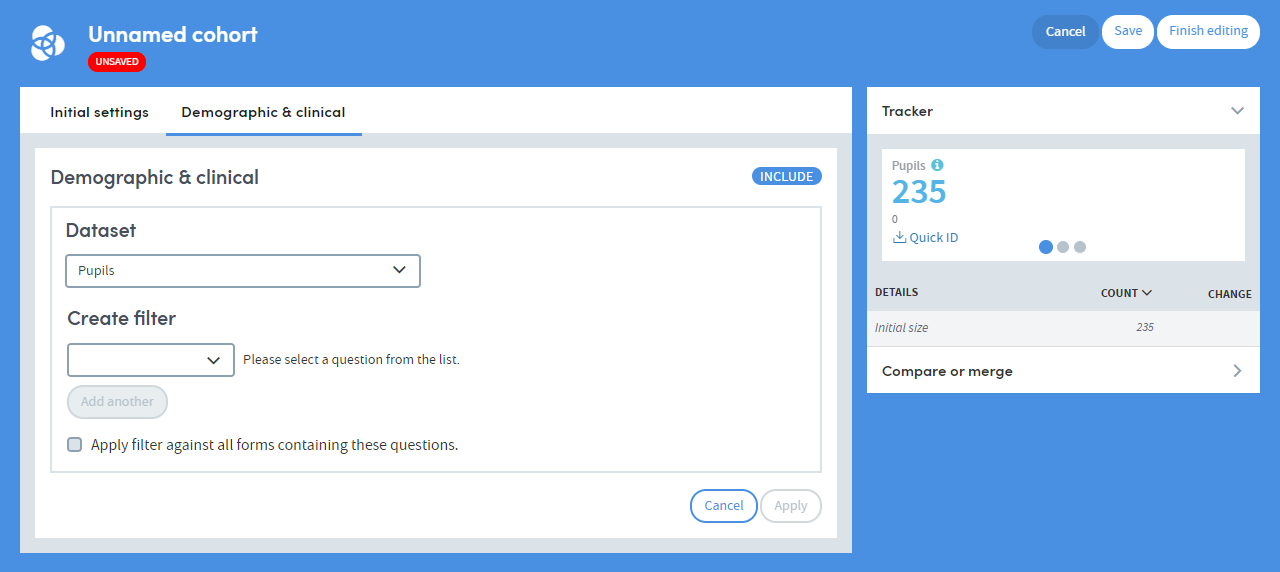
Dataset
First, select the Dataset from which you wish to choose your filters. In this example we’ve selected the Blood Sugar Result dataset.
Based upon
Click Change to choose whether to include All answers or The last answer given.
By default, each filter is applied to All answers, i.e. all the data collected from each pupil currently included within the cohort. However, there may be instances where it matters when the selected value was recorded.
For example, you might wish to see whether there were any pupils who, upon leaving school, had a pattern of missing school in the period in which their departure was imminent. This might be of concern as it might imply the pupil had been struggling within the setting.
In this case the option Based upon: All answers can be altered to Based upon: The last answer given, by clicking Change.
When this selection is made the filter will be applied to the most recent answer recorded against the dataset records, i.e. the answer closest to the pupils leaving date, rather than any and all answers recorded for each pupil.
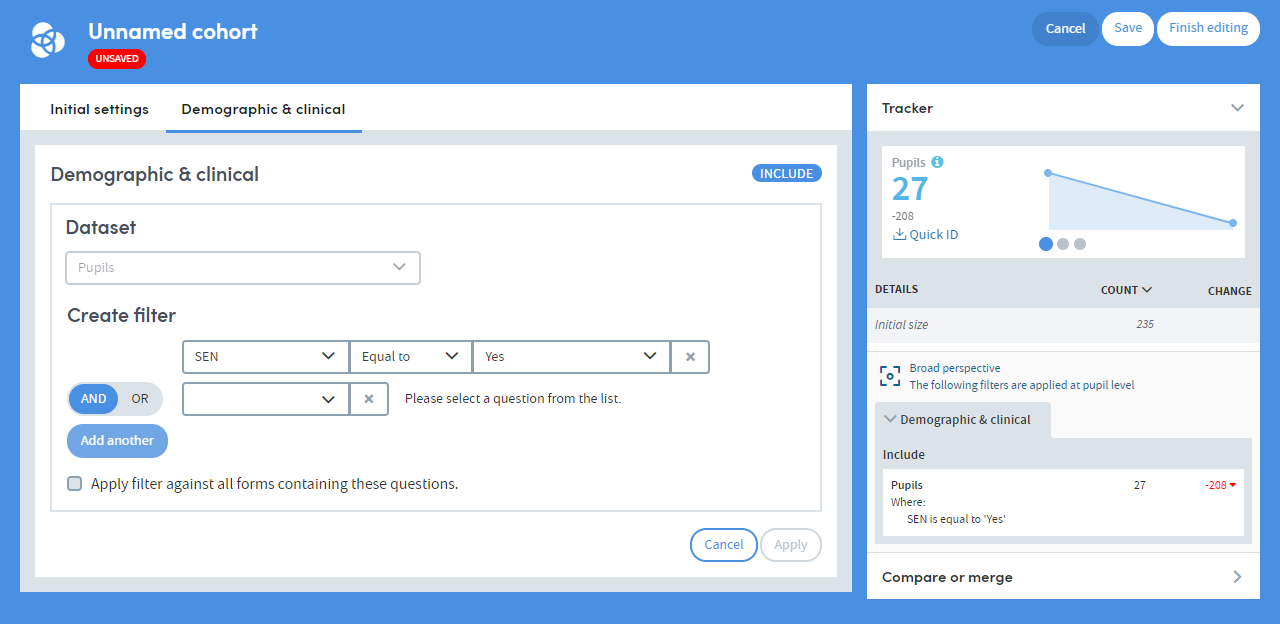
Create filter
Browse the list of items within the dataset and select one. Every selection has three elements:
- The data item or question, e.g. Has Special Education Needs
- An operator, e.g. greater than or equal to
- The answer, e.g. Yes
Applying your filter
Click here to apply your selections to the cohort. The tracker on the right will show the impact of the filters as you apply them.
Building complex filters
You can build up complex series of criteria using the various AND and OR operators.
Your first step is to choose whether the criteria you’re choosing will include or exclude your subjects from your cohort. After that you have an extremely flexible set of options.
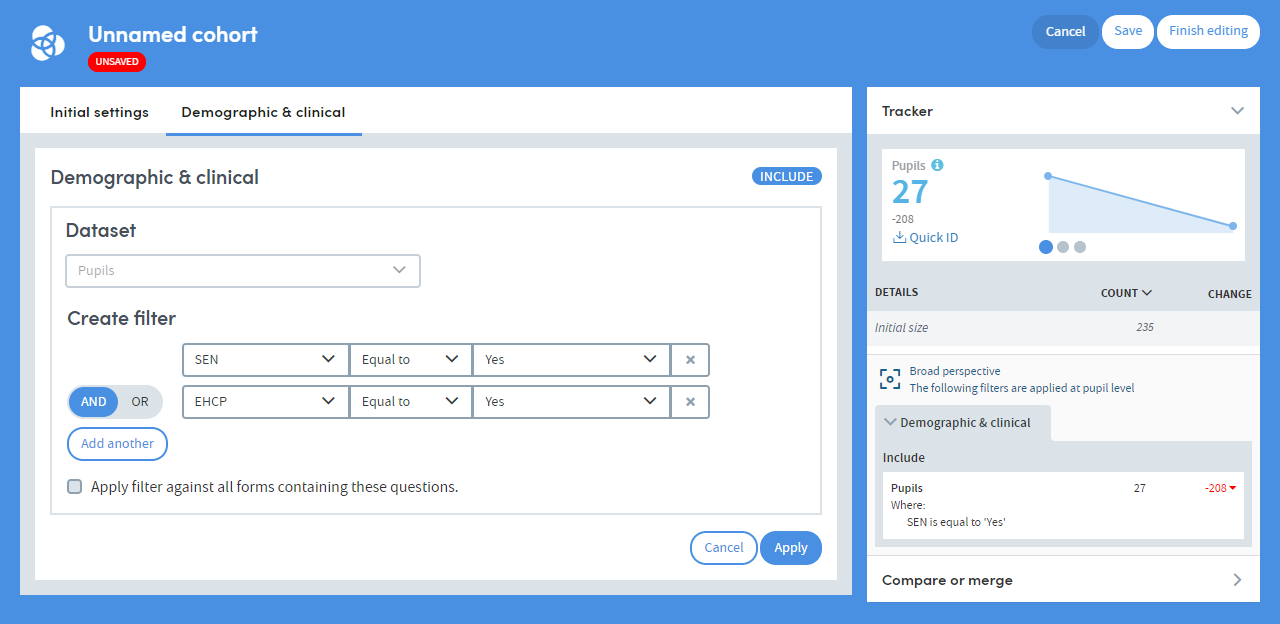
Add criteria from the same dataset
Create your first filter, then click Add another
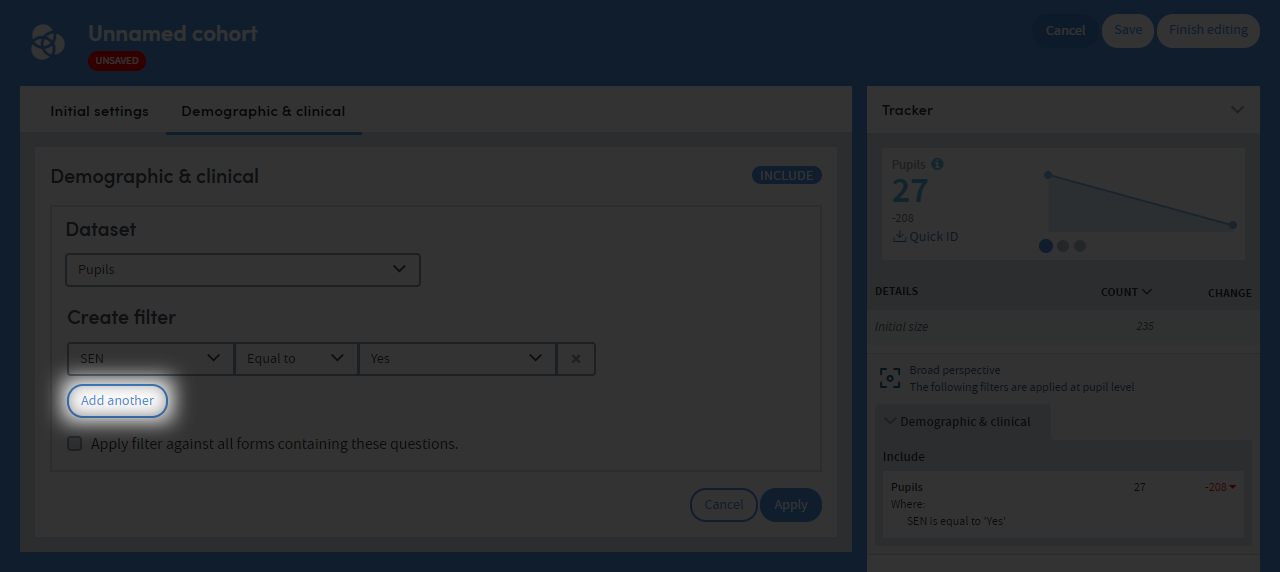
You’ll be presented with some further options:
The dataset named is greyed out, as you’re restricted to choosing items from this dataset.
Choose AND or OR to apply to the next criteria, then choose the next data item, operator and answer. In the example below we’ve set two criteria within one dataset
Nested criteria
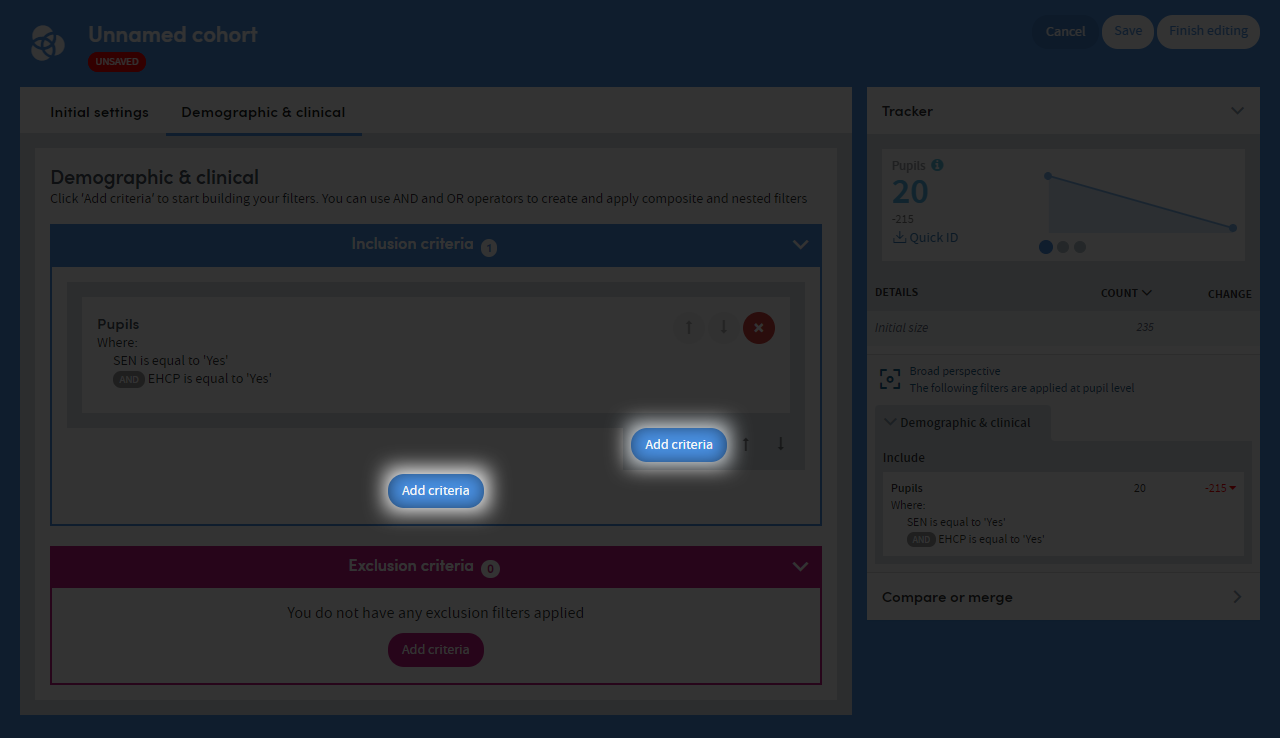 Use the different add criteria buttons to build up filters. Each button applies to the criteria within that part of the ‘nest’
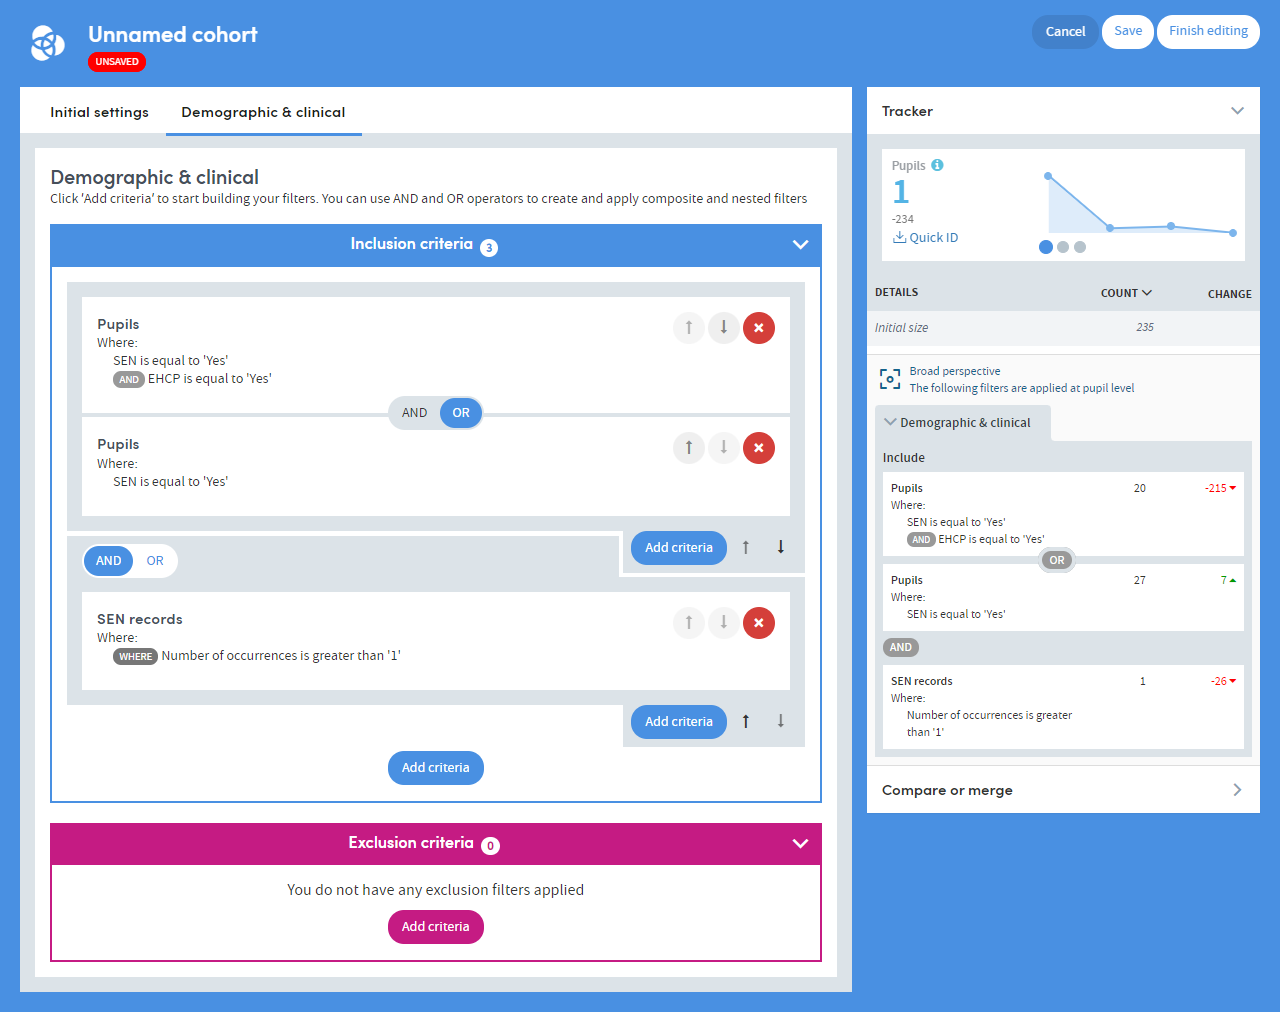 Here we’ve created a set of criteria defined as
Include pupils who have
- Special Education Needs AND an EHCP in place; OR
- Special Education Needs
AND
- Have more than one condition
You can add exclusion criteria in the same way.
Using date filters
It’s worth noting that when you create a filter, you have some extra options if you select a date item. You can set a filter based on a time period relative to a second date within the same dataset.
For example, you might want to include patients in your cohort who have encounters lasting more or less time than expected, or you might want to find patients with encounters which started in the past week. In this example we’ll work with a Unit Stay dataset to include patients whose Unit Stay started within the last five days.
Use the drop-down list to choose the dataset you want to work with. Next, choose your date item from the Create filter drop-down
Click the second field, and find the relative to option in the list of operators
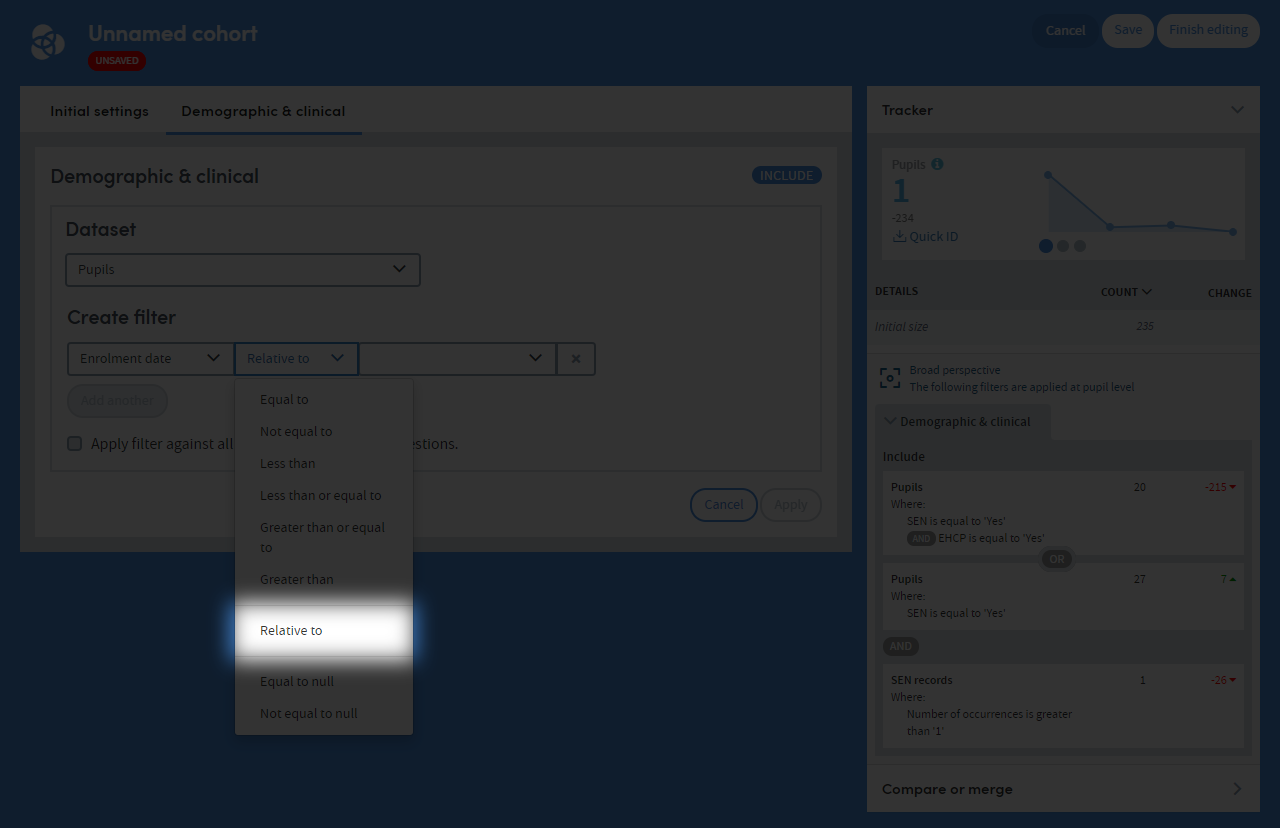
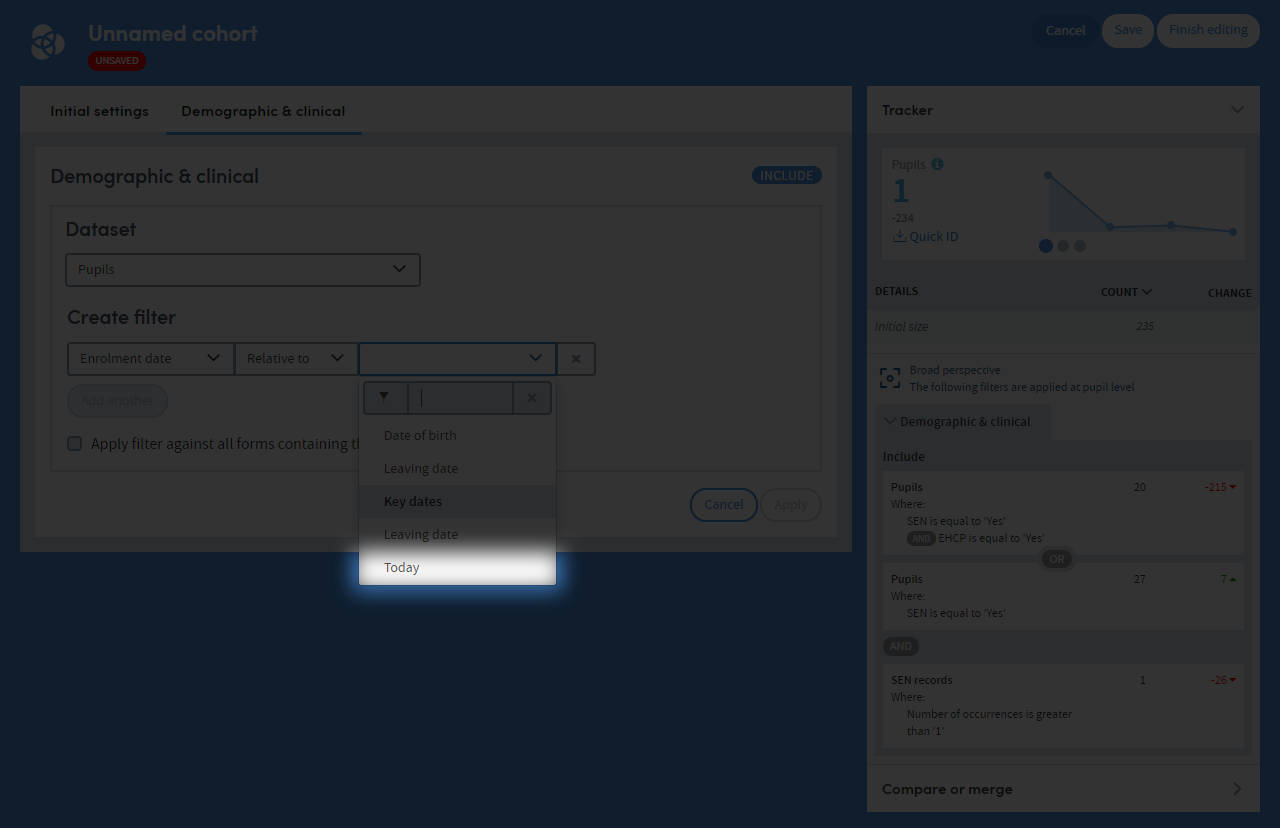
In the third field, click today:
A further set of options will appear. Complete these fields with the operator and duration you require. Here we’ve entered greater than 5 days
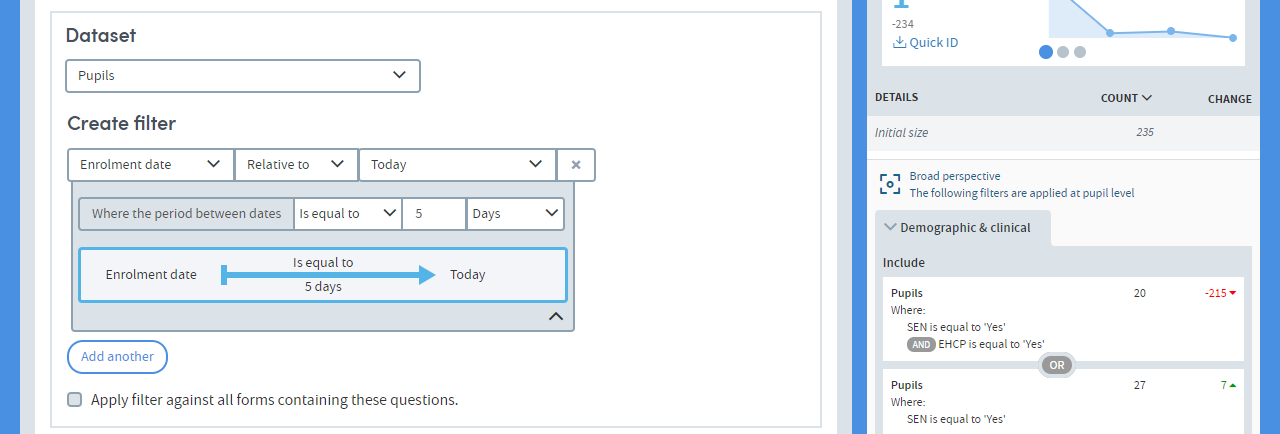
Because your cohort filter date is set as relative to Today, the cohort members will change as the cohort information is updated to filter by the current day.
Removing dataset filters
Click the X on the right if you want to remove a filter after you have set it

If you move away from the Cohort Discovery area while creating a cohort, your work will be lost if you have not saved it
Further reading
- Previous article: Activity Center
- Previous article: Tracked Cohorts
- Next article: Creating Reports